Selecting A Template - First Task
XRipe Visual Website Builder makes building your own website quick, easy, and hassle-free, without programming skills. Most of the tasks include selecting a ready-made design template, editing the texts, uploading photographs/images if necessary. You can also drag-drop elements of the template from one position to another, select, insert/edit others. Six simple steps for creating your website: Select a design template, Create a project, Copy-paste, Edit texts Drag and drop your images (if necessary). Compile and Preview your future website, Save and Publish your website
Selecting a Template for Your Future Website
XRipe enables you to select your favorite template from the Template Gallery.
1 If you are logged in, then in your dashboard, click the Add New Website button at the bottom of the page. You'll be taken to the template library page. If you are not logged or not yet registered in the system, then go straight to template library page.
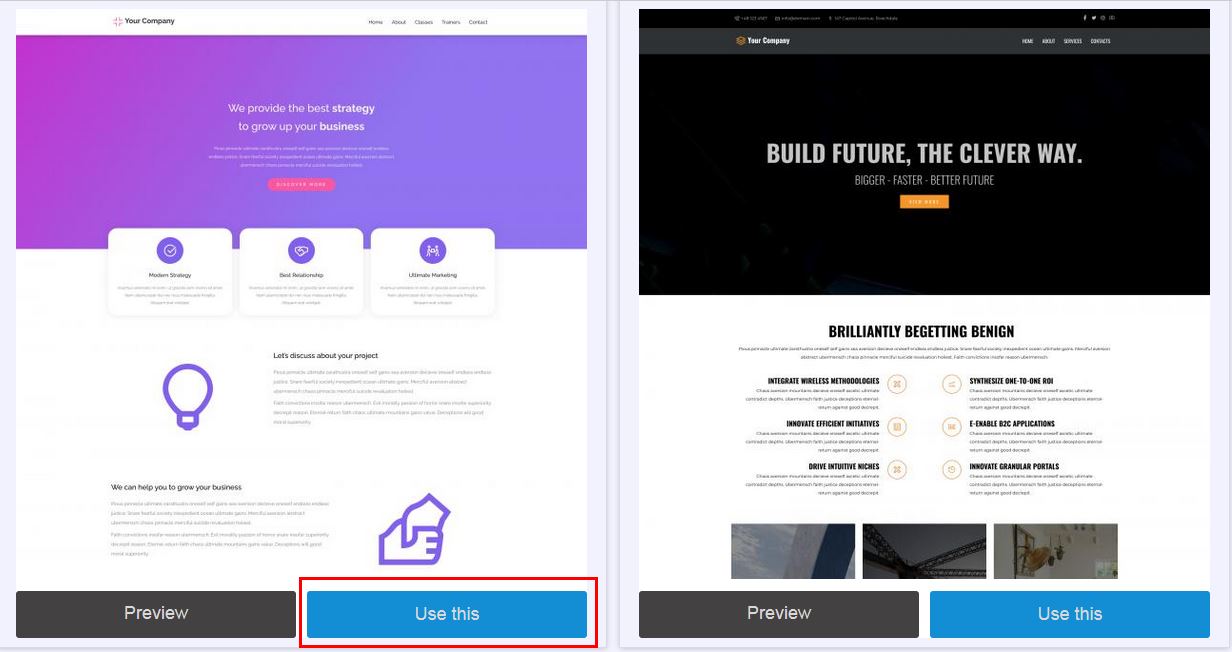
2 Browse through the template gallery list and select the one that suits you best. Hover your mouse cursor over the template thumbnail, scroll down and click Preview to see the look and feel of the template in a new browser window or tab. Close the window tab and click Use This to start building your website with the template.
Most of the templates include About Us, Our Services, FAQ and other blocks/sections you are likely to need. Much later in the Constructor, you can delete sections you don't need or add sections you need, but are not present in the current template you've selected. Alternatively you can start with a blank page template, by selecting the template without a thumbnail - that's the very first template (Template #1). If you should start with a blank template, then you can use XRipe constructor's AGGREGATOR to import and construct the various blocks of your website.
Most of the templates include About Us, Our Services, FAQ and other blocks/sections you are likely to need. Much later in the Constructor, you can delete sections you don't need or add sections you need, but are not present in the current template you've selected. Alternatively you can start with a blank page template, by selecting the template without a thumbnail - that's the very first template (Template #1). If you should start with a blank template, then you can use XRipe constructor's AGGREGATOR to import and construct the various blocks of your website.
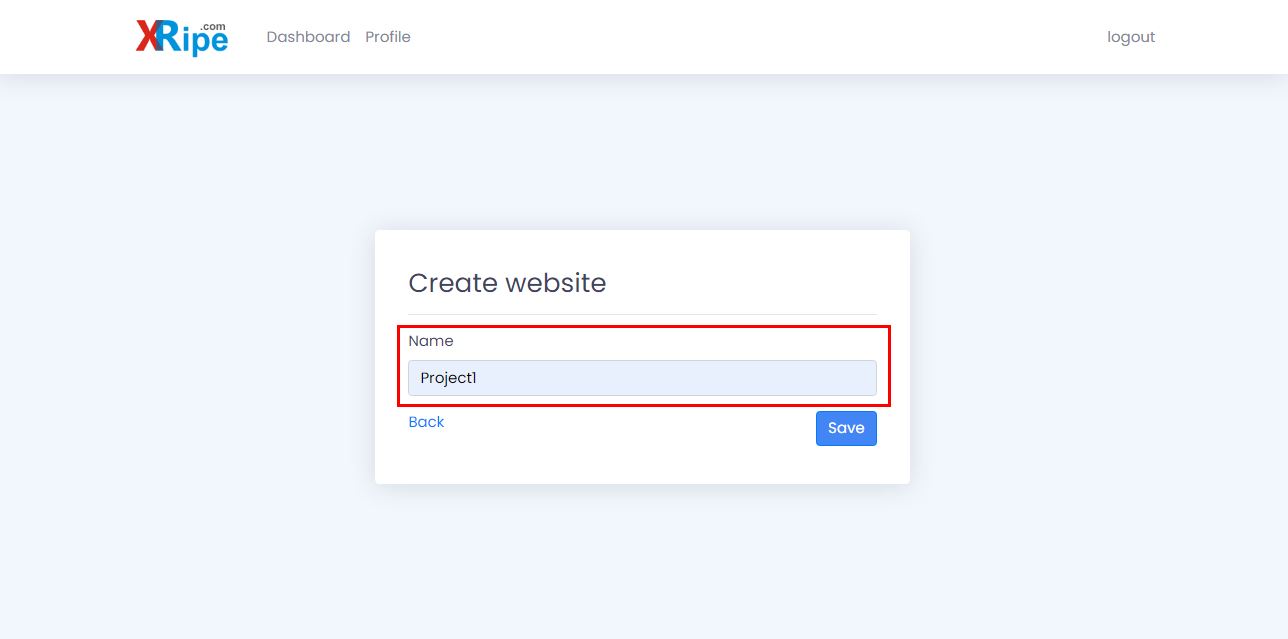
3 After you have decided on the template to us and have clicked Use This, you will taken to the dashboard and presented with a form to enter the name of the website or project. If you are not logged in or not yet registered in the system, then you will be prompted to so.
Give your website a unique name to distinguish it from other websites. If you've selected a wrong template or want to discard everything, then click Back, otherwise click Save to continue. Be aware that once you've entered the name and clicked Save, you can not change the name in future. The name you give to the website will also be used to host the website - if you decide in future to use the free hosting option offered by XRipe. If you plan to use your own custom domain for hosting the website in future, then you can give any name to the website project.
Give your website a unique name to distinguish it from other websites. If you've selected a wrong template or want to discard everything, then click Back, otherwise click Save to continue. Be aware that once you've entered the name and clicked Save, you can not change the name in future. The name you give to the website will also be used to host the website - if you decide in future to use the free hosting option offered by XRipe. If you plan to use your own custom domain for hosting the website in future, then you can give any name to the website project.
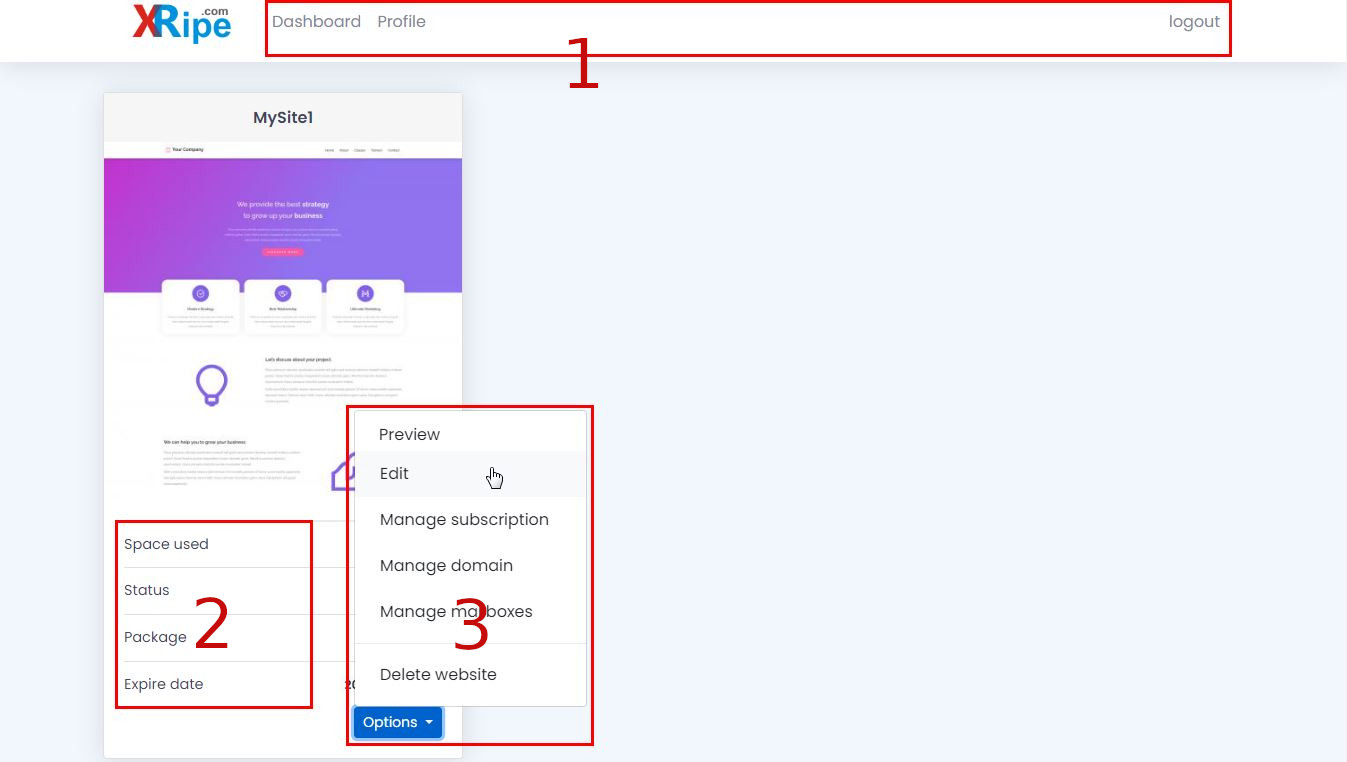
4 Still on the dashboard page. To start building your website with XRipe, click on the Options button. Select Edit to proceed to the Constructor page.
Landing on the constructor page, the next thing recommended you do is customize your website
Landing on the constructor page, the next thing recommended you do is customize your website


